Once you’ve installed the files for the Asterisk GUI, you can begin to play with developing for the GUI. Over the next few sections, we’ll walk through setting up the various components and putting them together to enhance and expand the capabilities of the GUI.
The Asterisk GUI issues commands to Asterisk by calling specially crafted URLs to the Asterisk web server. This section provides examples of some commonly used commands (actions) and the corresponding web server responses. These AMI URLs have the following general structure:
http://hostname:8088/asterisk/rawman?action=command&....parameter=value pairs...
http://hostname:8088/asterisk/manager?action=command&....parameter=value pairs...
http://hostname:8088/asterisk/mxml?action=command&....parameter=value pairs...
The difference between the rawman, manager and mxml URLs is important. The web server exports
three different views of the AMI interface. If you use a rawman URL, the server returns a series of
keyword/value pairs in the HTTP response. If you use a manager URL, the server returns the result
formatted as HTML. In a similar style, if you use a mxml URL, the server returns the results
formatted in XML. For modern Ajax-style applications, the rawman and mxml forms are probably more useful.[132]
The actions that can be sent to the server, along with their
parameters, are the ordinary manager commands described in Appendix F, Asterisk Manager Interface Actions. Note that the LOGIN and CHALLENGE actions are unique in that they
aren’t sent to Asterisk itself, but are processed by the Manager
interface to authenticate the user. If the user hasn’t authenticated
correctly, the server returns an error response rather than sending the
action to Asterisk for processing.
Let’s look at some commonly used actions, and see how we can use them to control the server.
The LOGIN command
authenticates credentials for the Manager interface’s HTML view. Once
you are logged in, Asterisk stores a cookie on your browser (valid for the length of the
httptimeout setting). This cookie is used to
connect to the same session. The URL:
http://localhost:8088/asterisk/rawman?action=login&username=asterisk_http&secret=gooey
sends a login command to the web server that includes the credentials. If successful, the web server responds with:
Response: Success
Message:  Authentication accepted
This, of course, is a very simplistic way for a login to work. Sending the username and secret password in a URL is bad practice, though it’s very useful during development. A more appropriate way to handle the login, and an example of more complex command processing, is to use a challenge/response sequence. Issue a request like this:
http://localhost:8088/asterisk/rawman?action=challenge&AuthType=md5
The CHALLENGE command
initiates a challenge/response sequence that can be used to log in a
user. The server responds by sending a challenge (an arbitrary string)
in the response:
Response: Success
Challenge: 113543555
Your application answers the challenge by computing the MD5 hash of the challenge concatenated with the user’s password. Here’s how a user might manually calculate the MD5 hash:
#echo -n 113543555gooey | md5sum50a0f43ad4c9d99a39f1061cf7301d9a -
You can then use the calculated hash as the login key in a URL like this:
http://localhost:8088/asterisk/rawman?action=login&username=asterisk_http&authtype=md5&key=50a0f43ad4c9d99a39f1061cf7301d9a
Warning
For security reasons, the login action must take place within five seconds of the challenge action. Note also that cookies must be enabled for the challenge/response to work, as the cookie ensures that the login action uses the same manager session ID as the challenge action.
If you use a manager URL to
request the challenge (instead of using rawman), the response will be formatted as
HTML:
<title>Asterisk™ Manager Interface</title> <body bgcolor="#ffffff"> <table align=center bgcolor="#f1f1f1" width="500"> <tr><td colspan="2" bgcolor="#f1f1ff"><h1> Manager Tester</h1></td></tr> <tr><td>Response</td><td>Success</td></tr> <tr><td>Challenge</td><td>113543555</td></tr> </table> </body>
Similarly, if you use the mxml view instead, you will receive a
response formatted as XML:
<Ajax-response>
   <response type='object' id='unknown'>
      <generic response='Success' challenge='113543555' />
   </response>
</Ajax-response>
Other than the formatting, there are no other differences
between the three types of responses. For most applications, digging
the challenge out of the keyword/value pairs will be much simpler than
using rawman or mxml in a situation like this, where you
don’t need to display the HTML to the user.
The REDIRECT action can be used to transfer a call. Simply generate a
URL such as:
http://localhost:8088/asterisk/rawman?action=redirect&channel=SIP/John-ae201e78&priority=1&exten=6001
This URL transfers the specified channel to another extension and priority in the dialplan. The response to this action is:
Response: Success
Message: Redirect Successful
The GETCONFIG command
returns the contents of a configuration file, or portion
thereof. The URL:
http://localhost:8088/asterisk/rawman?action=getconfig&filename=users.conf
returns the contents of the users.conf file. The Asterisk GUI uses this functionality to present the
current Asterisk configuration to the end user. The response looks
like this:
Response: Success
   Category-000000: general
   Line-000000-000000: fullname=New User
   Line-000000-000001: userbase=6000
   Line-000000-000002: hasvoicemail=yes
   Line-000000-000003: hassip=yes
   Line-000000-000004: hasiax=yes
   Line-000000-000005: hasmanager=no
   Line-000000-000006: callwaiting=yes
   Line-000000-000007: threewaycalling=yes
   Line-000000-000008: callwaitingcallerid=yes
   Line-000000-000009: transfer=yes
   Line-000000-000010: canpark=yes
   Line-000000-000011: cancallforward=yes
   Line-000000-000012: callreturn=yes
   Line-000000-000013: callgroup=1
   Line-000000-000014: pickupgroup=1
   Line-000000-000015: host=dynamic
   Category-000001: 6007
   Line-000001-000000: fullname=Bill Savage
   Line-000001-000001: secret=1234
   Line-000001-000002: email=bsavage@digium.com
   Line-000001-000003: cid_number=6001
   Line-000001-000004: zapchan=
   Line-000001-000005: context=numberplan-custom-1
   Line-000001-000006: hasvoicemail=yes
   Line-000001-000007: hasdirectory=no
   Line-000001-000008: hassip=yes
   Line-000001-000009: hasiax=yes
   Line-000001-000010: hasmanager=no
   Line-000001-000011: callwaiting=yes
   Line-000001-000012: threewaycalling=yes
   Line-000001-000013: mailbox=6007
   Line-000001-000014: hasagent=yes
   Line-000001-000015: group=
The UPDATECONFIG
action is used to update one or more settings in a
configuration file. For example, to delete a user you should use a URL
like this:
http://localhost:8088/asterisk/rawman?action=updateconfig&reload=yes&srcfilename=users.conf&dstfilename=users.conf&Action-000000=delcat&Cat-000000=6003&Var-000000=&Value-000000=
A user must be logged in to the web server before any other
commands can be issued. Any of the commands we’ve discussed will
return an error response if the user is not authenticated. If it’s not
given by an authenticated user, this URI http://localhost:8088/asterisk/rawman?action=ping
returns this response to indicate an
error:
Response: Error
Message:  Authentication Required
As an acronym, Ajax stands for Asynchronous JavaScript and XML. While the term includes the words asynchronous and XML, this does not mean that you can make only asynchronous requests, nor are you required to use XML. Some authors describe Ajax as simply a combination of HTML, JavaScript, DHTML, and DOM. The next generation browsers, such as Mozilla/Firefox, use an XMLHttpRequest (a JavaScript object) to send an asynchronous request to the server. The request is made in the background and processed by the server.
Back on the browser, the result is handled by a callback: whatever the server returns can be stored and used to update the page being displayed. For Internet Explorer 5 or later, the XMLHttp ActiveX object serves the same purpose.
HTML forms are usually submitted by using a submit button (type=submit). When the user clicks the
submit button, processing stops, and doesn’t continue until the server
returns a new page:
<FORM action="login.php" method="POST">
  <input type=text name="username">
  <input type=password name="password">
  <input type=submit>
</FORM>
Before going any further with Ajax or JavaScript, let’s take a
look at how a traditional web application works. Traditional web
applications use HTML’s <FORM> element to define a form in
which all of the parameters a user needs to send to the server are
defined. In addition the action="login.php" informs the browser where
to send all of these variables. The method="POST" tells the browser how to send
these variables to the server.
An Ajax application uses JavaScript to send the contents of a form to the server. If you have made the request asynchronously, your JavaScript code doesn’t wait for the server to respond. This also means that you can let the users continue to interact with the page, even though a request may be taking place in the background. This can be dangerous and, thus, you may want to restrict certain actions until a request has completed. The browser, by default, gives no visual indication that a request is being made in the background. It is your responsibility to inform the user of the progress of a request. Here’s the code for submitting the contents of the username and password fields via Ajax:
<script language="javascript" type="text/javascript">
 function submitform(){
  var uname = document.getElementById("username").value;
  var pwd = document.getElementById("password").value;
  // xmlHttp = new ActiveXObject("Msxml2.XMLHTTP"); // IE 7
  // xmlHttp = new ActiveXObject("Microsoft.XMLHTTP"); // IE 5
  xmlHttp = new XMLHttpRequest(); // Mozilla or Firefox

  var url = "/rawman?action=login&username=" + escape(uname) + "&secret=" + escape(pwd);

  xmlHttp.open("GET", url, true);
  xmlHttp.onreadystatechange = dosomething;
  // dosomething() would be another JavaScript function
  xmlHttp.send(null);
}
</script>
The getElementById()
method reads the value of the username and the password
fields. This code then gets an XMLHttpRequest object, which it uses to send these values back to the server.
Note that the kind of object you need depends on whether your users
are using Internet Explorer 7, 5, or Mozilla/Firefox. It’s fairly easy to write code to
handle all of these situations, or to use a library like Prototype to
handle platform independence for you. The username and password are
encoded in a URL and sent to the server. The call to xmlHttp.onreadystatechange registers a
handler to process the result that the server returns to us.
This code only deals with making the XMLHttp request, and it
tells the browser to call the dosomething() function when there is a
response from the server. Here’s a dosomething() function that handles
this response:
<script language="javascript" type="text/javascript">
  function dosomething() {
    if (xmlHttp.readyState == 4) {
      var login_response = xmlHttp.responseText;
    }
  }
</script>
Tip
Make sure that each XMLHttp step has completed (with either success or failure) before performing the next one.
This function is called whenever there’s a change in the state
of the HTTP request. The if
statement saves the response only if the request’s readyState is 4, which means that the
request has completed. The JavaScript variable login_response now contains the response of
the login page.
Note that this is very far from being production-ready code. In particular, the simplistic username and password handling is appropriate for testing, but would be a serious security problem in a production system—even if the application is used only on a private network. To build more robust and secure password handling, use the challenge/response system presented earlier. If you want to learn more about writing Ajax web applications, we recommend Head Rush Ajax by Brett McLaughlin (O’Reilly).
Prototype (http://prototypejs.org) is a
JavaScript framework released under an MIT-style
license. Prototype can make your job extremely easy while developing
an Ajax application. It provides many ways to make your code shorter
and clearer. For example, in the submitform
function, the call to document.getElementById() can be replaced by
the $() function. Likewise, the
call to value to get the DOM
element’s content can be replaced with a call to $F(). Thus, document.getElementById("username").value
becomes simply $F('username'); the
result is code that’s much simpler and more readable.
Prototype also makes it easy to make XMLHttp requests in an
elegant manner. Using Prototype’s Ajax object, the submitform() function can be rewritten
as:
<script language="javascript" type="text/javascript">
function submitform(){
   var url = '/rawman';
   var pars = 'username=' + escape($F('username')) + '&secret=' + escape($F('password'));

var myAjax = new Ajax.Request( url,
  { method: 'get',
    parameters: pars,
    onComplete: dosomething
  });

}
</script>
Not only is this code much shorter, you don’t have to write
browser-specific code in your web pages; Prototype takes care of the
differences between Mozilla/Firefox and the various versions of
Internet Explorer. Furthermore, it takes care of testing the request’s
readyState, so you leave that
annoying if statement out of your
handler. Prototype has lots of built-in functions, some of which have
been extensively used in the Asterisk framework. There’s no room to
discuss them here, but for more information, see the Short Cuts
Prototype Quick Reference by Scott Raymond and
Prototype and Scriptaculous: Taking the Pain Out of
JavaScript by Chris Angus, both from O’Reilly.
Now that we’ve explored the different pieces that form the
foundation of the Asterisk GUI, we have what we need to be able to
explore the GUI itself and modify it to fit our needs. To get to the
Asterisk GUI, go to the following address in your browser:
http://localhost:8088/asterisk/static/config/cfgbasic.html.
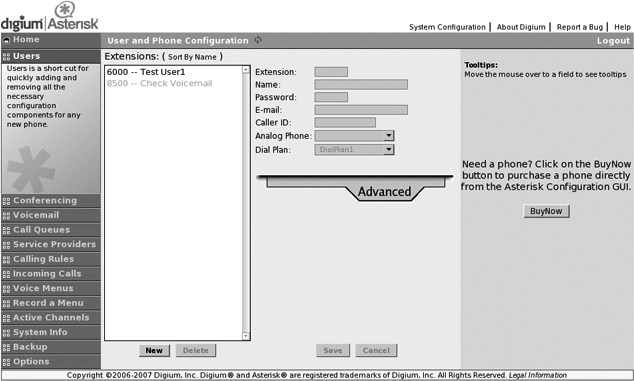
Looking at Figure 11-1 might lead you to conclude that the Asterisk GUI is simply one more Asterisk GUI in an already crowded space. Nothing could be further from the truth. This GUI doesn’t just allow you to tweak it, it practically begs you to. In this section we are going to discuss how you can modify the GUI and use AJAM to build your own extensions to the GUI. In order to benefit the most from this information, you need some HTML and JavaScript knowledge.
The GUI home page is named cfgbasic.html. All other pages are loaded
into the iframe contained within the cfgbasic.html page. By default, cfgbasic.html loads home.html into the main frame.
For most changes to the GUI, you’ll eventually need to
modify cfgbasic.html, which
is the login screen.
As an example of customizing the Asterisk GUI, let’s create a
new tab that displays the contents of extensions.conf. First, we need to create a
file and put it in the /var/lib/asterisk/static-html/config
directory. In this example, we’ll name the file test.html:
<script src="scripts/prototype.js"></script>
<script src="scripts/astman.js"></script>
<script>
function localAjaxinit() {
       parent.loadscreen(this);
       makerequest('g','extensions.conf', '' , function(t){
               $('ExtensionsDotConf').innerHTML = "<PRE>" + t + "</PRE>";
       });
}
</script>
<body onload="localAjaxinit()" bgcolor="EFEFEF">
       <div id="ExtensionsDotConf"></div>
</body>
This code simply displays the configuration of the extensions.conf file. Obviously it’s a very
simple example, but it shows the fundamentals of creating a new page
for the Asterisk GUI. Let’s walk through the example step by
step.
The first line tells the browser to load the Prototype library.
The second line tells the browser to load the astman.js file, which contains much of the
code designed to interact with the Manager interface.
Next, we define a function called localAjaxinit. The localAjaxinit
function first tells this page’s parent (cfgbasic.html in this case) to run the
loadscreen function, passing in
this page as the parameter. This causes the main GUI screen to load
our new test.html inside the
iframe. The second thing we do inside the localAjaxinit function is to use the
makerequest function. The makerequest function is defined in astman.js and makes it very convenient to
make requests to the web server.[133]
The first parameter of the makerequest function specifies what type of
request is being made. It can be set to any of the following:
-
'g' Use the
GetConfigaction to retrieve the configuration from the configuration file specified in the second parameter.-
'u' Use the
UpdateConfigaction to update the configuration in the configuration file specified in the second parameter. The third parameter to the function specifies the configuration data that should be updated.-
'' If the first parameter to the
makerequestfunction is a set of single quotes, then the custom action specified in the third parameter will be sent.
The fourth parameter is the callback function that will be called with the response to the Ajax request.
The rest of our test.html
simply contains an HTML body with a div element, which is where we’ll place the
configuration data when we get it. Note that the HTML body tag has an
onload attribute, which causes the
browser to execute the localAjaxinit function once the page has
finished loading.
Now that we’ve created a new page, we need to edit cfgbasic.html to add this page as a panel
in the GUI. Open cfgbasic.html
and search for a JavaScript function named returnpanels and insert this code in the
list of panels, where you would like your panel to appear:
newpanel( ["Test", "test.html", "Test"]);
Now reload the GUI in your browser. You should see a new tab on
the lefthand side named Test that
displays the configuration values for extensions.conf when clicked.
While there’s a lot more to learn about the AJAM interface and the Asterisk GUI, this example should show just how easy it is to add new functionality to the GUI. In this next example, we’ll show how simple it is to expose a setting from the configuration files in the GUI.
As explained earlier, one of the unique benefits of the Asterisk
GUI over the other graphical frontends to Asterisk is that it updates
the configuration files in place, taking special care not to overwrite
or erase any extra settings you might have in your configuration
files. To show just how easy it is to expose new settings in the GUI,
we’ll add a simple checkbox to the GUI to make it possible to set the
nat setting in users.conf.
If you open the GUI and click on the tab labeled Users, the GUI loads the file named
users.html in the iframe. Let’s
open up users.html (usually
located in /var/lib/asterisk/static-http/config) and
begin modifying it to add our checkbox.
First, search near the top of the file where a variable named
fieldnames is defined. This
variable contains a list of all of the field names that will be set by
this page of the GUI. Simply add nat to the end of the list, or add the
following line directly below the current definition for fieldnames.
fieldnames.push('nat');This tells the Asterisk GUI that we want to be able to see the
value of nat and to be able to set
it as well. In order to see or set the value, however, we need to add
an element to the HTML form. To do that, search users.html for the IAX checkbox, and add
the following lines between it and the CTI checkbox.
 <tr>
   <td align=right><input type='checkbox' id='nat'></td>
   <td>NAT</td>
</tr>
Simply reload the page, and that’s all there is to it. With just
a few lines of additional code, we’re able to expose the nat setting to the GUI. It couldn’t be much
simpler!
Note
As you’re developing for the Asterisk GUI, you’ll probably find that debugging Ajax and JavaScript code can be somewhat difficult at times. We strongly suggest you make use of an extension to Mozilla Firefox named Firebug that greatly simplifies the task of debugging Ajax, JavaScript, and HTML. Check it out at http://www.getfirebug.com. There is also a scaled-down version for Internet Explorer known as Firebug Lite, which is available for download at the same web site.
Over the course of this chapter, we’ve introduced you to the Asterisk GUI and the AJAM framework. We’ve covered the architecture of how the GUI works, and how to modify the GUI. If you would like more information on developing a graphical interface for Asterisk, please refer to the GUI Developers Guide located at http://asterisknow.org/developers/gui-guide.